Step 1: Enabling the integration within Neos
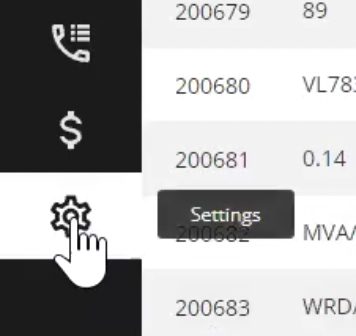
Step 1: Log into Neos and click the gear icon on the left navigation panel to reach the Settings page.
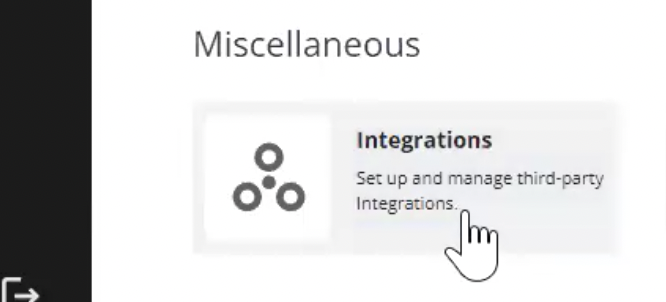
Step 2: Under the Miscellaneous section, click the card for Integrations.
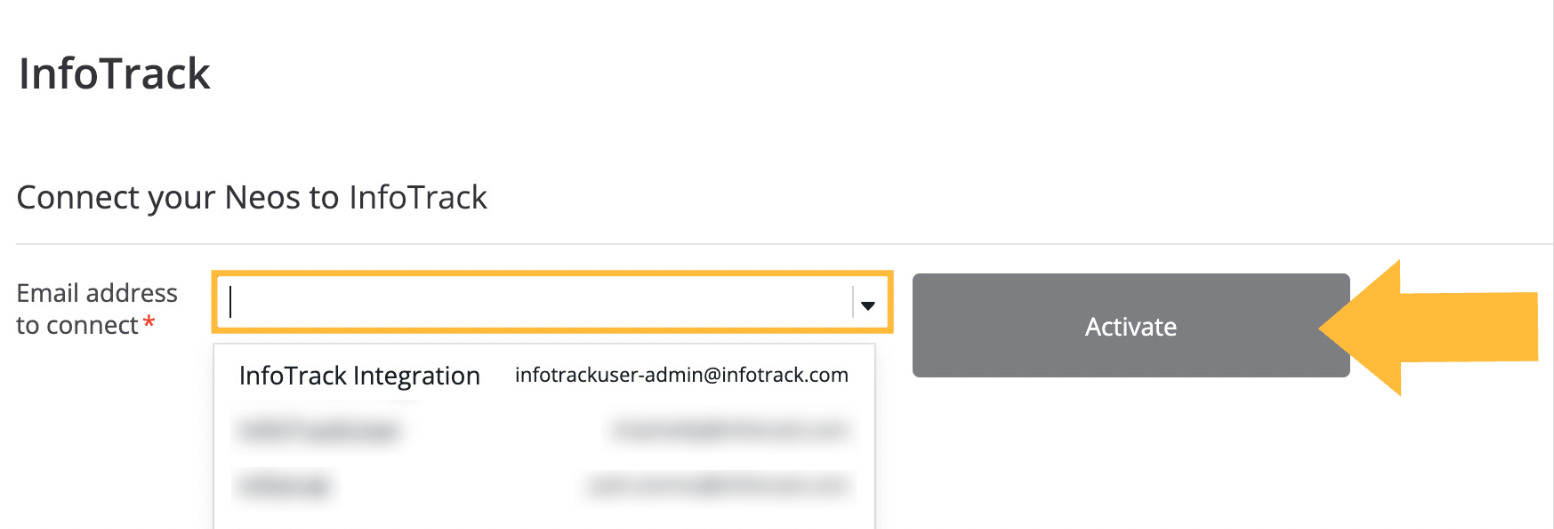
Step 3: Scroll through the alphabetical list of integrations and click on InfoTrack. Enter a Neos user email address you'd like to use to manage your integration and click Activate.
Step 4: Complete the InfoTrack registration form for Neos integration users, using the same email you just connected with in Neos.

Step 5: After you complete the form, you will be signed into InfoTrack with a Neos integration bar running across the top of your screen. Now you may complete the steps outlined in the first section above ("For Neos users with an existing InfoTrack account").
Step 2: Connecting to Neos within InfoTrack
After creating your InfoTrack account using this sign-up form, you'll need to take the following steps to fully connect with Neos.
Step 1: Log in to InfoTrack.
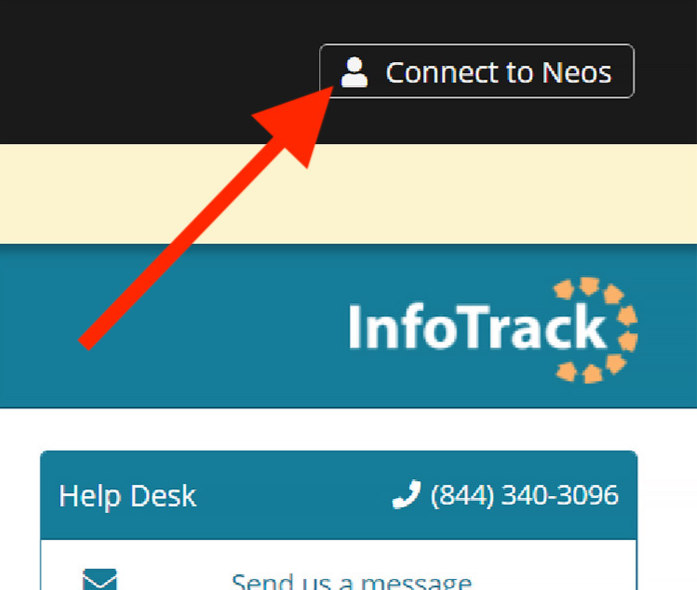
Step 2: Click Connect to Neos in the Assembly Neos bar at the top right of your screen. If your credentials are accepted, the button text will change to Connect Case.
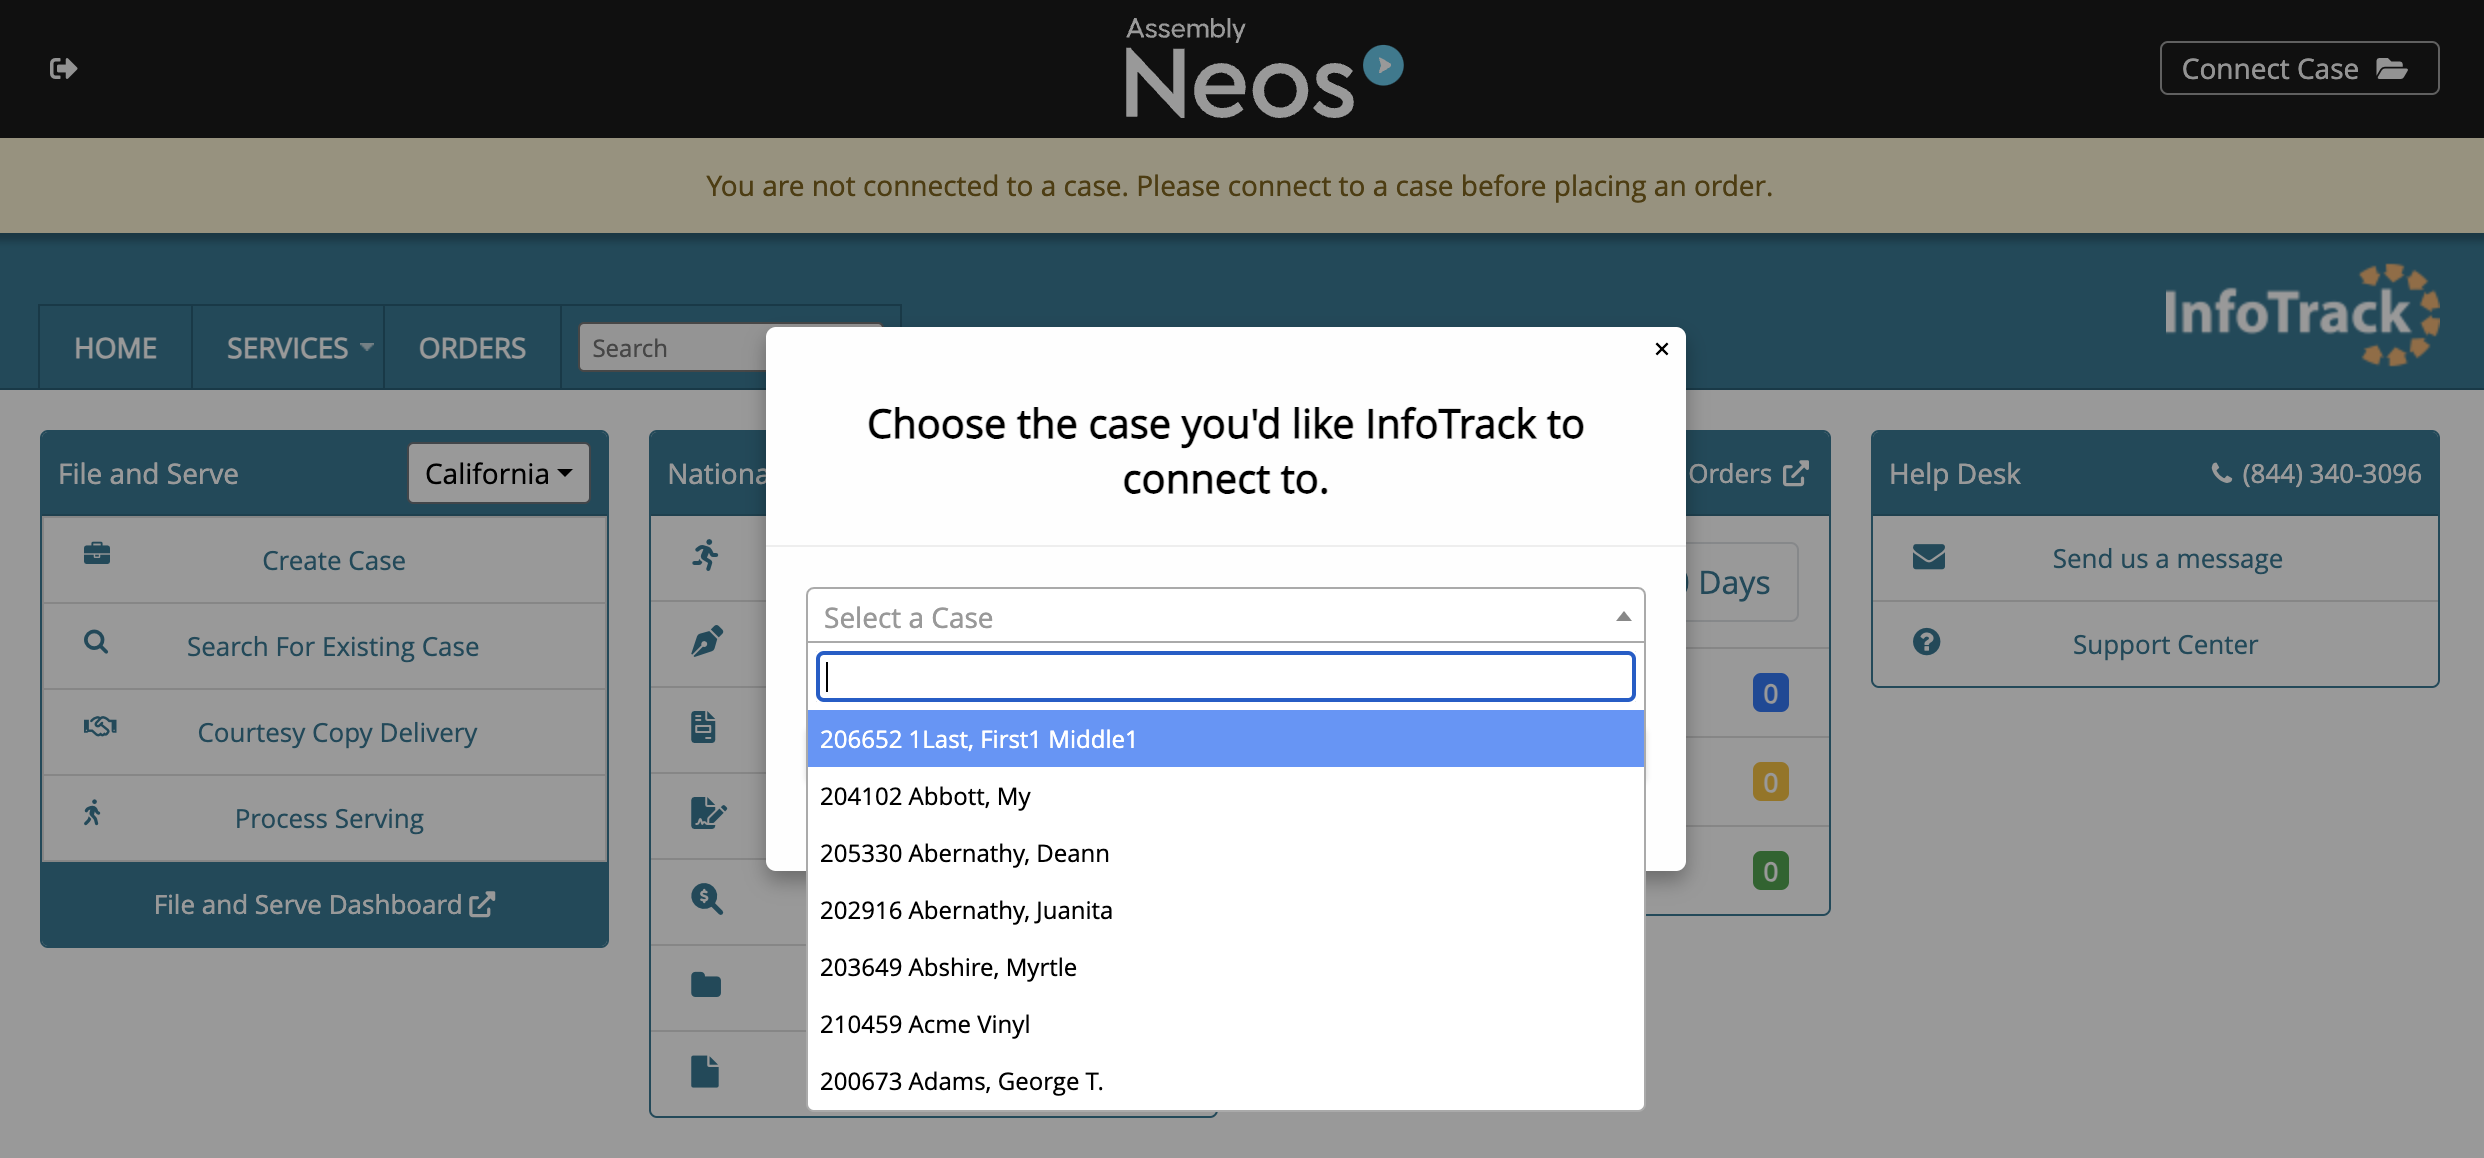
Step 3: Click Connect Case and select your case from the dropdown list.
Step 4: Complete the order workflow in InfoTrack, and watch expenses and documents sync back to your Neos case automatically.