InfoTrack is currently the only third-party vendor in Florida that includes full, statewide subsequent filing functionality, including the ability to file proposed orders.
Let's quickly demonstrate how the process works.
Before you file: Set up your attorney account(s)
When you click on the InfoTrack eFiling option directly from your case management system, you’ll normally be taken directly into the filing workflow.
However, before you can file in Florida, you’ll need to link at least one attorney account on the Florida Courts E-Filing Portal to your InfoTrack account.
Once your attorney accounts are linked, you'll never have to re-enter attorney details during the filing process.
Launching your subsequent filing
Just as in the case initiation workflow, the best way to launch a subsequent filing is to use the InfoTrack action menu in your integrated case management system. This ensures InfoTrack is connected directly to your matter, which is important for selecting and syncing documents and data.
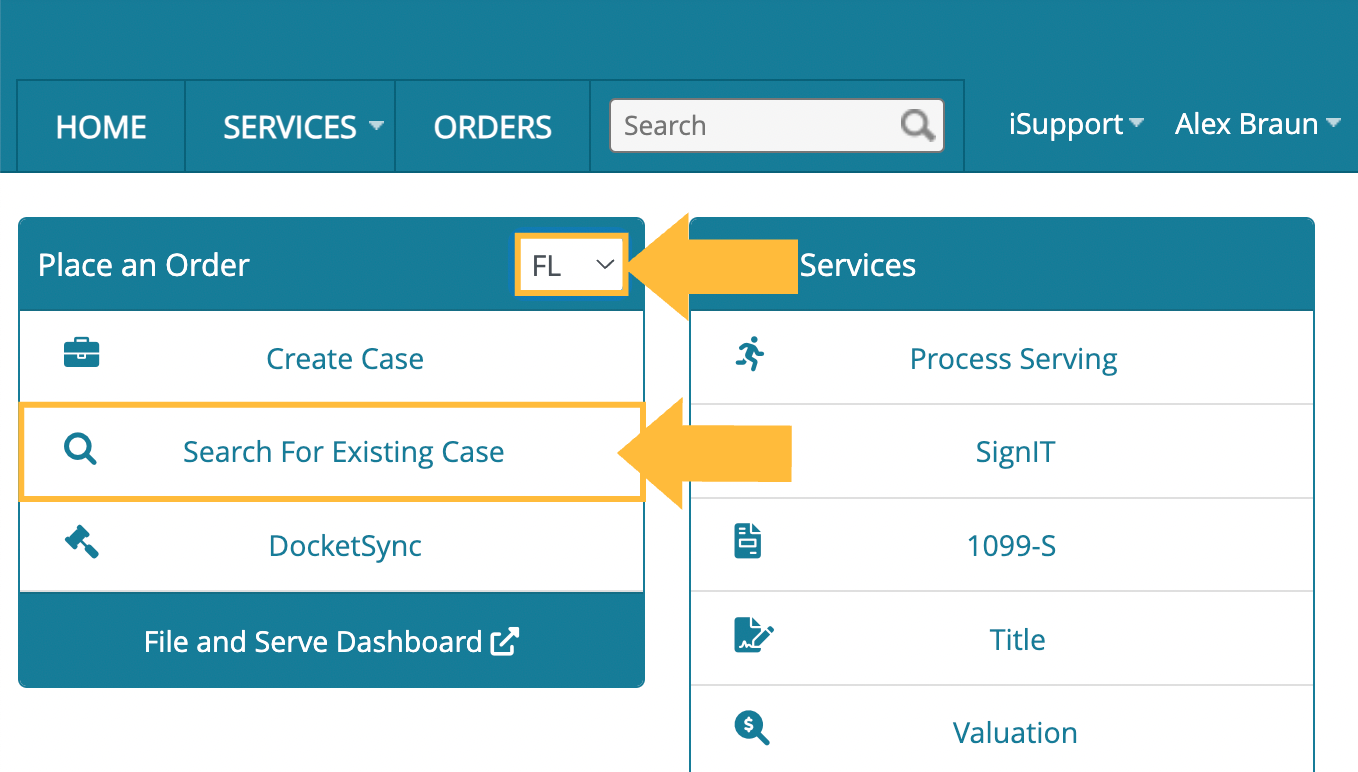
This should take you to the InfoTrack Home screen. Set the Place an Order widget to FL, and click the Search for Existing Case button.
Starting the filing workflow
If you are integrated with a matter in your case management system, InfoTrack uses the saved case number to automatically look up case details and pre-fill them for you, as shown below.

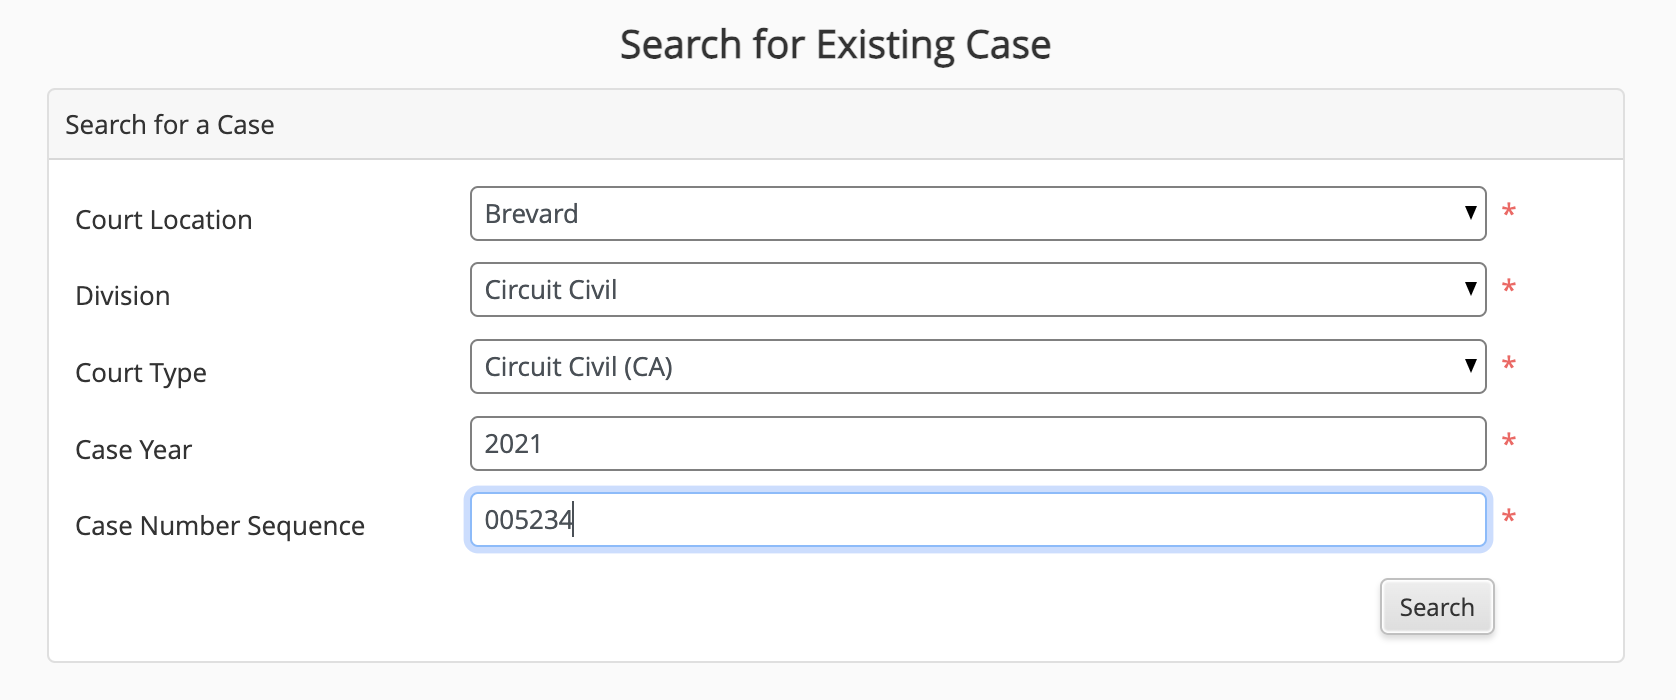
If you aren't integrated, you'll need to re-enter court and case details and search for the case by its case number, as shown below. If a case entry is found, you'll reach the same screen depicted in the previous screenshot.
Details like parties should be added automatically from information in the case initiation, but you may also have the choice to optionally add to this information if necessary.
Adding documents
There are two main workflows for adding documents in a subsequent case in Florida. The path you take depends on whether you check or uncheck the following box that appears early in the filing workflow.

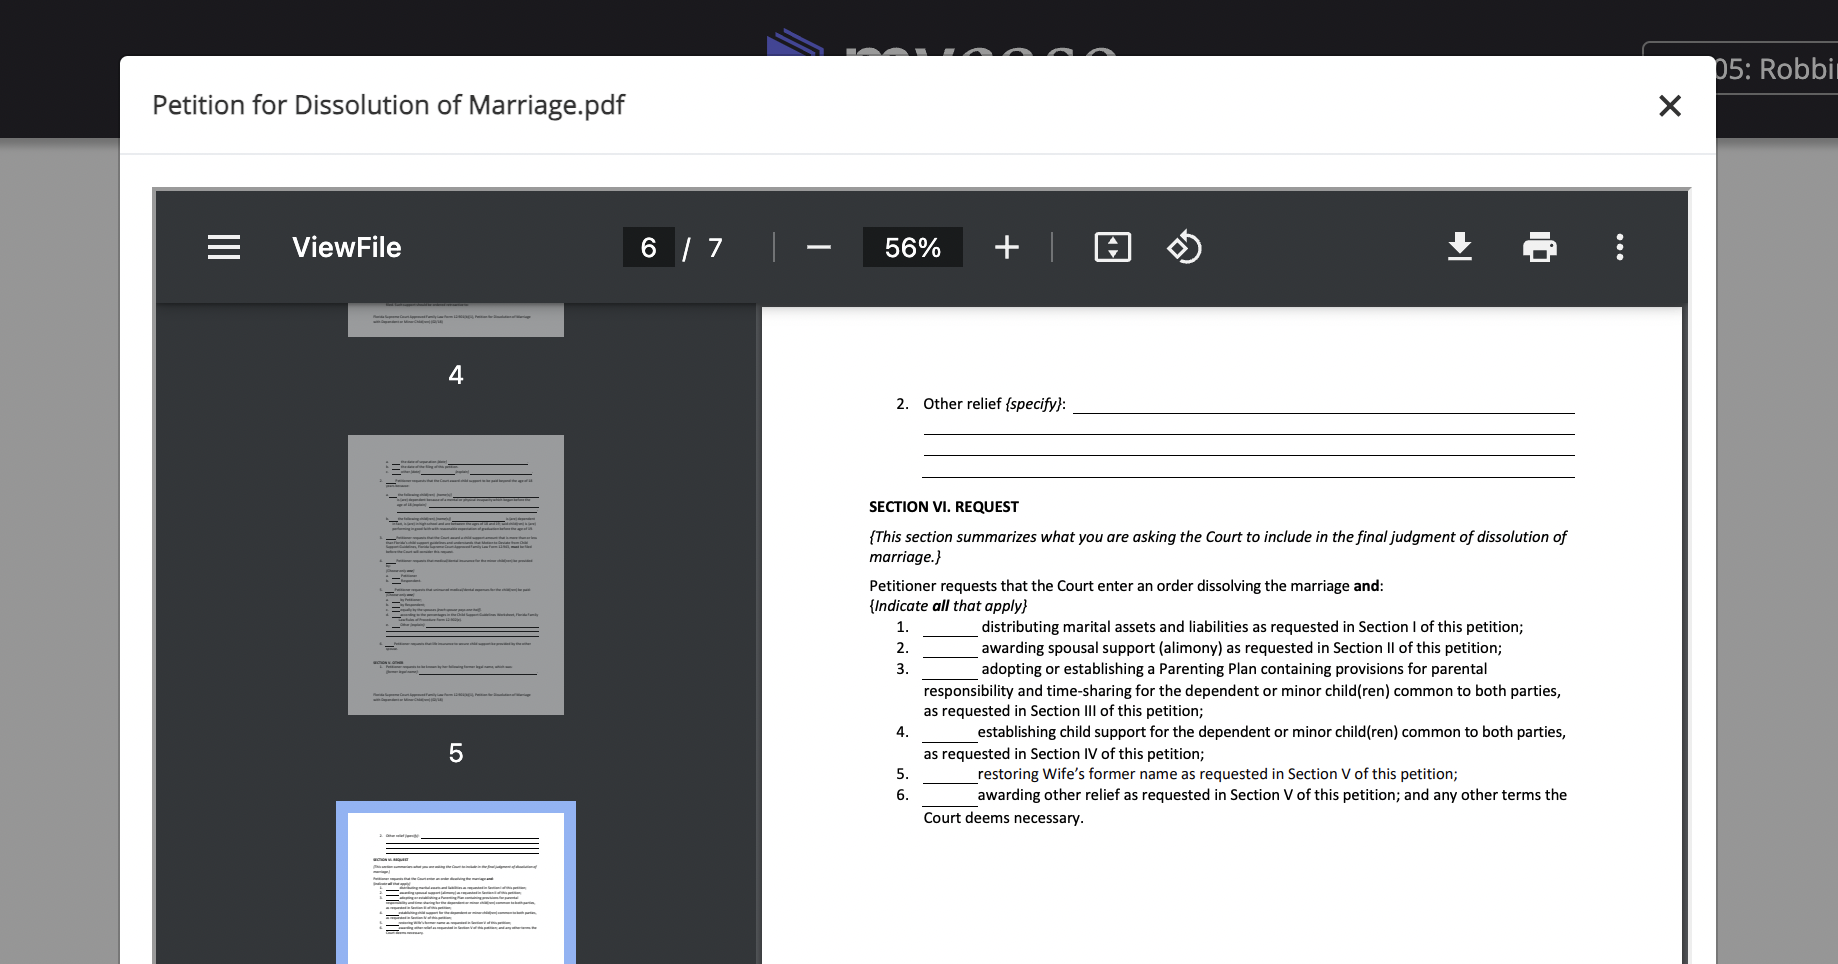
To add a proposed order
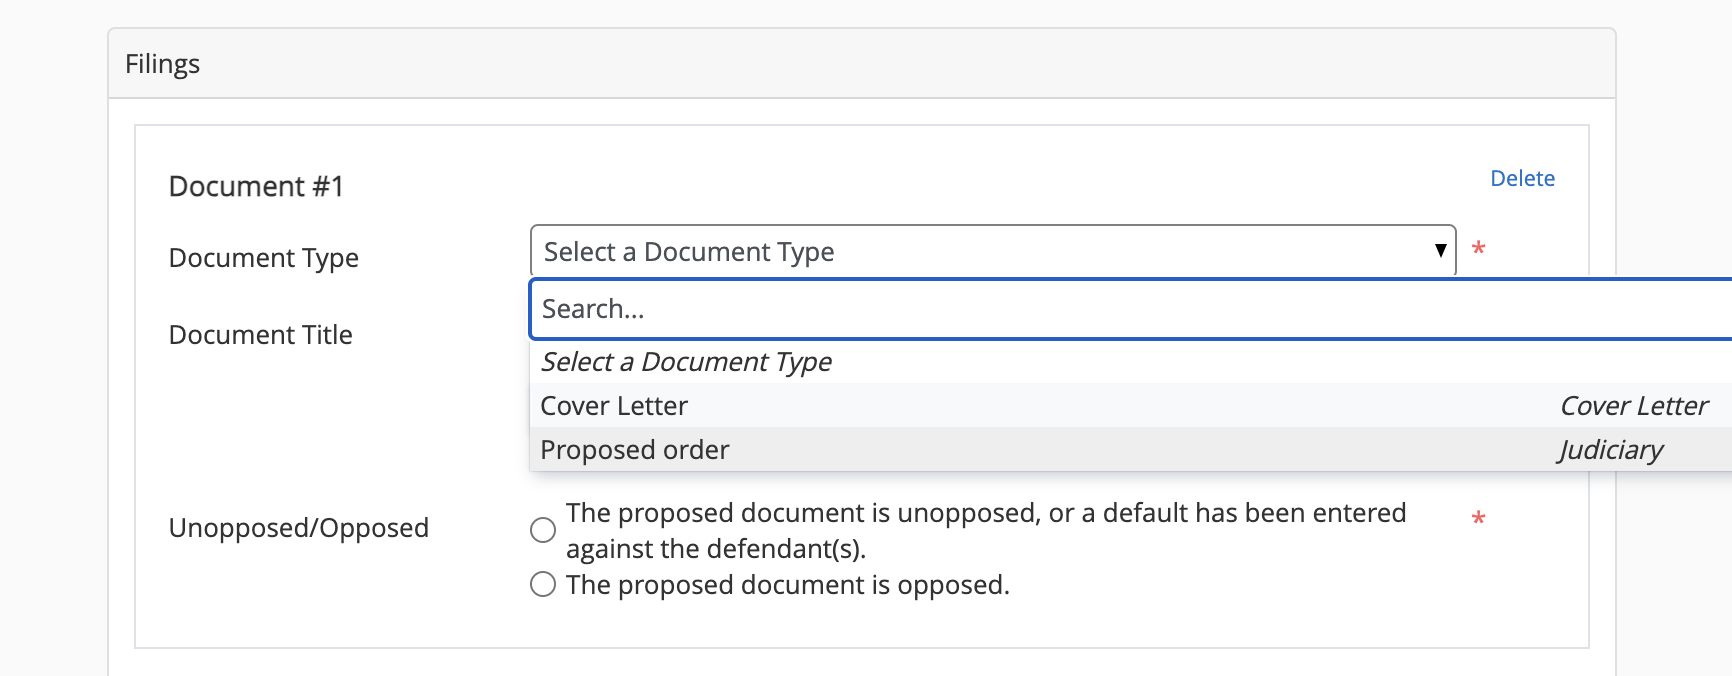
Check the box that says Add Proposed Documents to Judiciary, and select the applicable judicial officer or division.
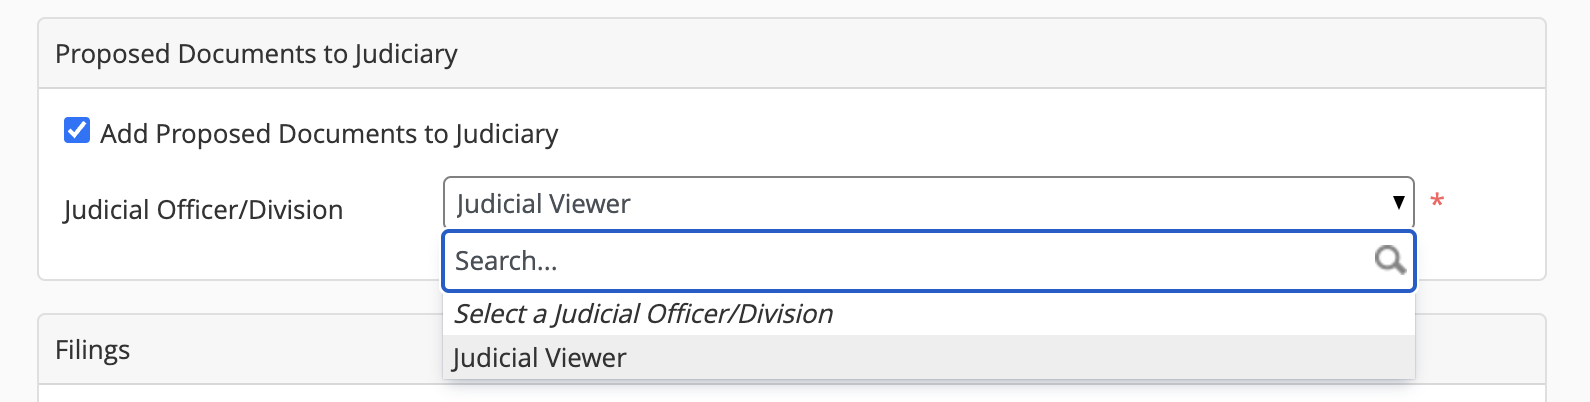
This will result in a special list of document types related to proposed orders being available in the Filings section to follow.
For more details, see our article on filing proposed orders in Florida.
To add any other document type
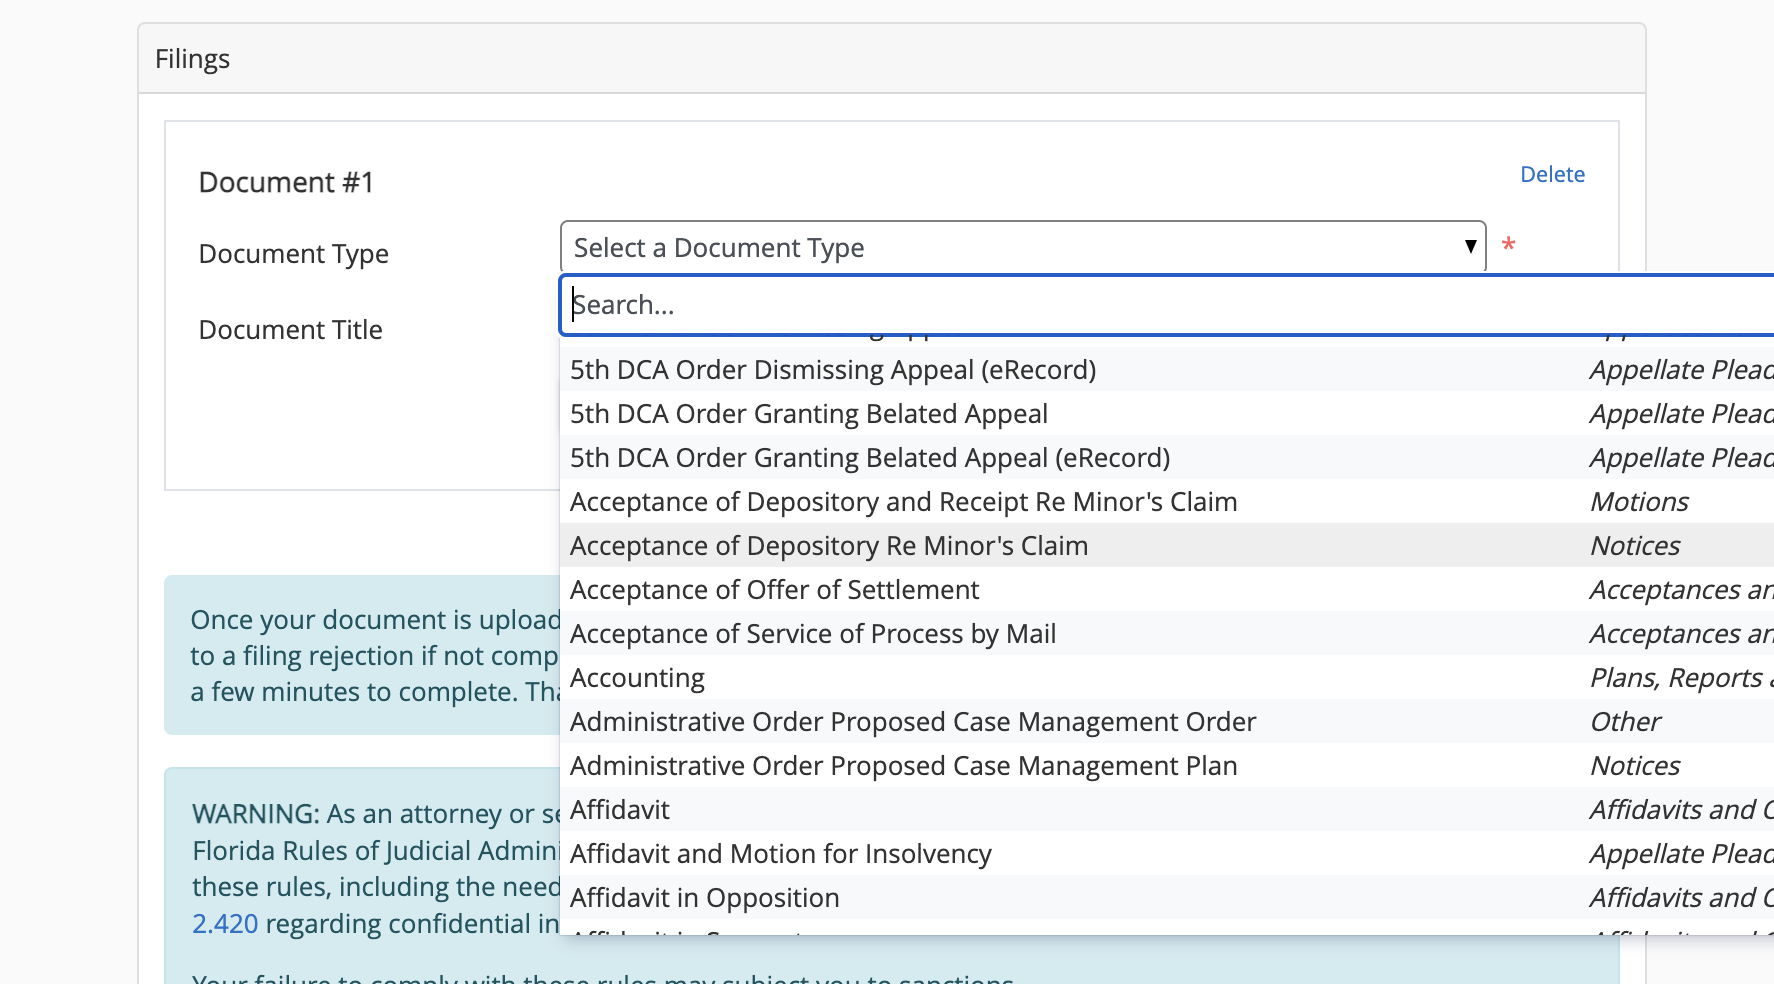
Leave the Add Proposed Documents to the Judiciary box unchecked, and continue to the next section.
This will result in the full list of document types for that court, division and case category being displayed in the Filings section.
Uploading/attaching your document
Choose your document type in the Filings section and click the Upload File button.

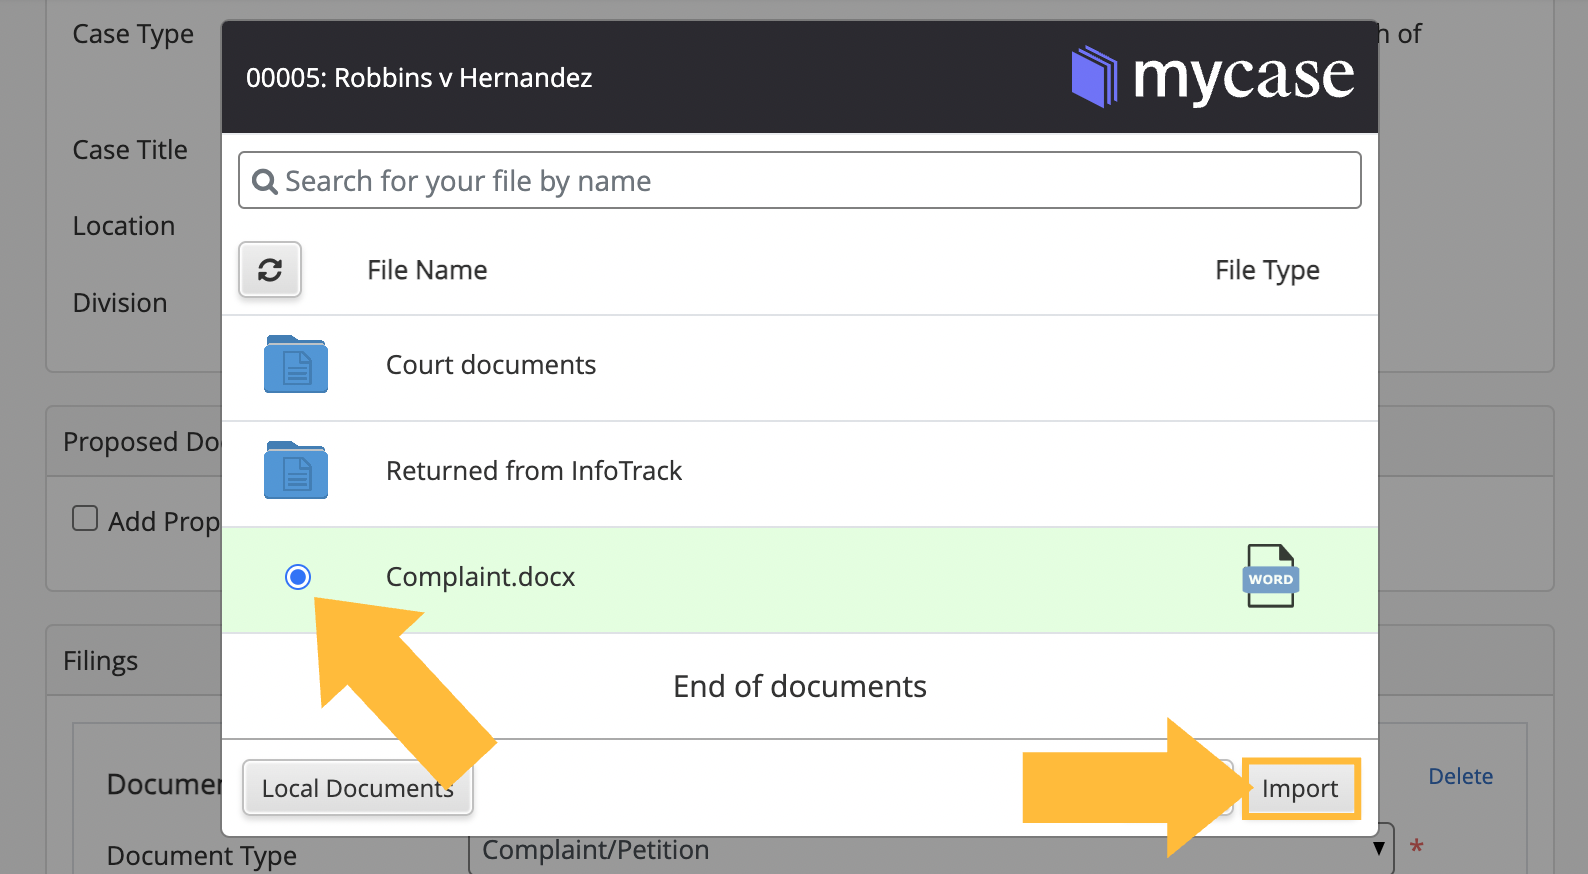
If you're integrated with a case management system, a pop-up file picker will launch, showing documents saved in your matter record.
Choose any document and click Import to continue. Or, click Local Documents and select a document from your computer.
InfoTrack will automatically convert any documents in common text editor formats—such as a Word file—to the court-accepted PDF format, and display details about its page count and file size.
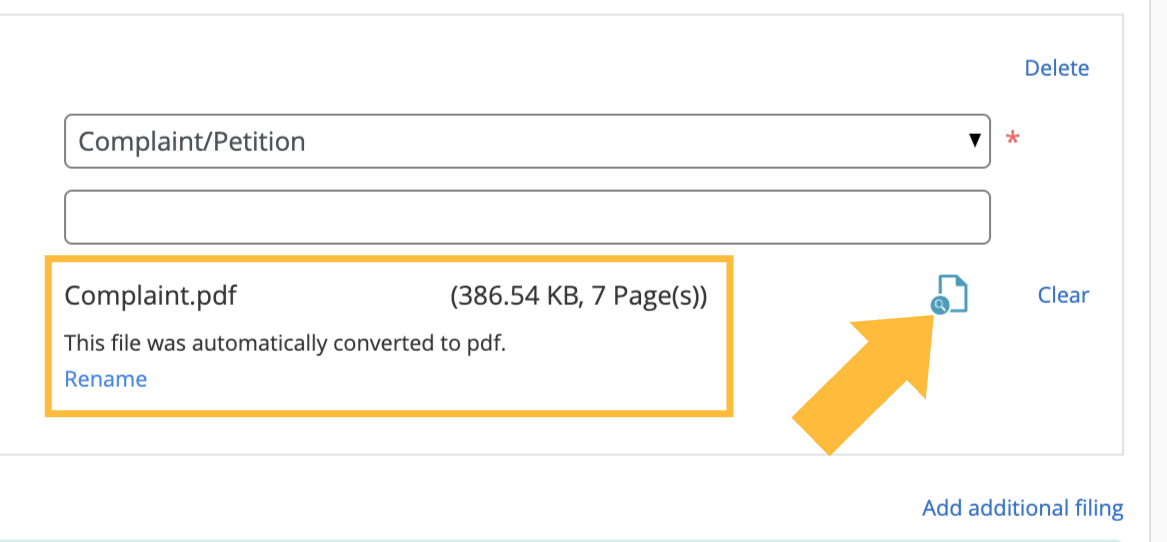
To check that the file is ready, click the blue document preview icon.
Once this has been checked, if you don’t have any add-on options that require an additional court fee, you skip ahead to select your filing attorney.

Any attorneys we linked during our account setup will be available here. This means you can select your attorney in two fast clicks, rather than logging in with their credentials each time you file.
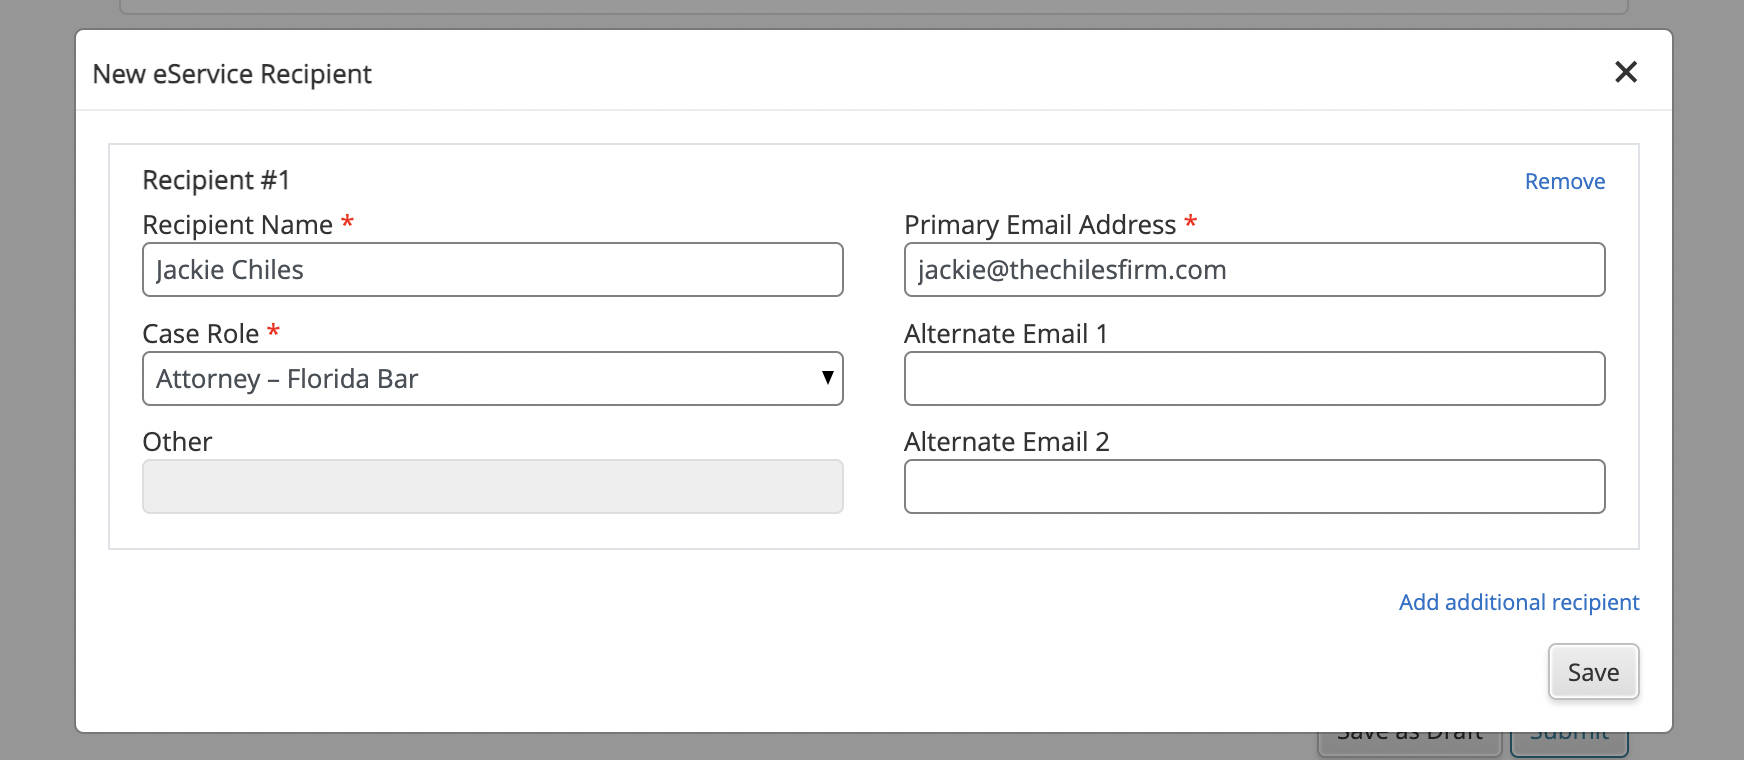
Adding electronic service

InfoTrack is currently the only third-party filing solution for Florida that features full electronic service through the Florida Courts E-Filing Portal. In just a few quick seconds, you can add recipients to the official eService list and make sure they get notified of your filing.
Submitting your filing
Before you click Submit, take a moment to review the estimated fees at the bottom of the page.
Any court-assessed filing fee line items will mention the name of the court.
All InfoTrack fees are listed under Total Provider Service Fees. Because InfoTrack does not charge for eService, only the flat fee per envelope applies here.
After your filing is complete
You'll be presented with an order confirmation page with key details about your filing, and receive an invoice for the court fees and InfoTrack's service fee with the next billing cycle.
You can also retrieve all of this order information—or information about any order made in InfoTrack, including process serving, electronic signatures, docket information, and more—by clicking back to the Orders screen.
As soon as the court stamps the document(s) you submitted, they will sync back to the matter record in your integrated case management system.